Tips on How to Cut Laminate Flooring for a Perfect Fit Every Time
Installing laminate flooring is one of the most rewarding home improvement projects because it transforms your space with a clean, modern finish. However, achieving a flawless installation requires precise cutting techniques. Many homeowners start their flooring projects with confidence but quickly discover that cutting laminate correctly is the most challenging part. To help you achieve clean, accurate cuts and professional results, this guide will walk you through how to cut laminate flooring properly, the tools you’ll need, and expert methods for every type of cut.
Whether you’re trimming laminate planks to fit around door jambs, cutting long angles, or shaping pieces to meet awkward corners, this detailed guide will help ensure every piece fits perfectly, every time.
What Is Laminate Flooring?
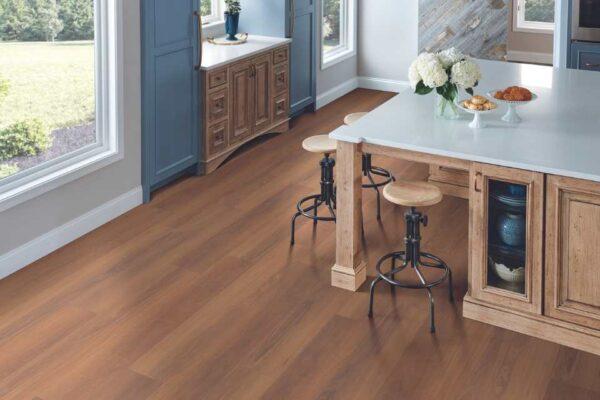
Laminate flooring is a multi-layer surface made from a dense, stable core topped with a decorative photographic layer and a durable wear layer. Unlike hardwood, laminate flooring does not require sanding or refinishing and is known for its affordability, scratch resistance, and easy maintenance. While laminate flooring offers the realistic visual appeal of wood, stone, or tile, proper installation, including precise cutting, is essential to achieve seamless, beautiful results.
Why Cutting Laminate Correctly Matters
Cutting laminate floor boards with precision directly impacts the quality of your flooring installation. Poorly cut pieces can lead to gaps, uneven seams, chipped edges, lifted planks, or weak locking mechanisms. Because laminate relies on a click-and-lock system, damaged edges can compromise the stability of the floor.
Furthermore:
-
Misaligned cuts create visible gaps
-
Jagged edges prevent planks from locking
-
Incorrect cuts cause trim or molding issues
-
Sloppy edges increase chipping and long-term damage
If you're wondering how to cut the laminate floor the right way, the answer lies in using the right tools, preparing your work area, and understanding laminate plank structure. This guide covers everything you need to know.
Preparing to Cut Laminate Flooring the Right Way
Before you begin to cut laminate flooring, it’s important to prepare your tools, workspace, and safety equipment.
Safety Gear You’ll Need
Cutting laminate planks generates dust and tiny wood particles. Protect yourself with:
-
Safety goggles to shield your eyes
-
Cut-resistant gloves to prevent injuries
-
Dust mask to avoid inhaling particles
Tools Required to Cut Laminate Flooring
While there are many ways to cut laminate, your tools determine the final quality. Depending on the shape and angle needed, you may use:
-
Laminate flooring cutter (ideal for straight cuts)
-
Miter saw (best for angled cuts and end cuts)
-
Circular saw (great for longer cuts or ripping boards to width)
-
Jigsaw (perfect for curved cuts, notches, and door jambs)
-
Table saw (best for ripping large pieces or long cuts)
-
Utility knife (good for scoring thin, flexible laminate)
-
Handsaw (traditional but time-consuming)
-
Straight edge tool for marking clean, accurate lines
A carbide-tipped blade, fine-tooth blade, or high TPI blade helps reduce chipping when cut laminate planks. Many professionals prefer down-cutting blades because they minimize surface chipping.
Measuring and Marking Laminate Boards
Accuracy is everything. Before cutting, take time to measure carefully.
You’ll need:
-
Straight edge
-
Carpenter's pencil
-
Template for irregular cuts
-
Painter’s tape (optional for chip-free edges)
Mark the cut line on the laminate board and double-check measurements before you begin. Laminate is not forgiving, once cut, it cannot be corrected.
Steps to Prepare Tile for Laminate Installation
Even if your flooring project seems simple, proper preparation makes cutting and installing laminate much easier.
1. Inspect Existing Tile or Subfloor
Ensure your work area is flat and stable. Any dips or bumps will affect your cut measurements.
2. Clean Floor Tile Thoroughly
Dust, debris, and raised grout lines can affect your measurements and fitting.
3. Install Underlayment
Underlayment improves:
-
Acoustics
-
Moisture protection
-
Warm underfoot comfort
-
Longevity of laminate flooring
How to Cut Laminate Flooring for Different Installation Needs
Because you will be cutting various shapes and angles throughout your flooring project, it’s essential to understand which tool works best for each type of cut.
Straight Cuts for Regular Installation
Straight cuts are the most common. They are used for trimming planks at the beginning or end of rows.
Tools to use: Laminate flooring cutter, miter saw and circular saw
Tips for perfect straight cuts:
-
Always cut laminate with the decorative side facing up when using a handsaw or jigsaw.
-
For power saws that cut upward, turn the board facing down.
-
Use painter’s tape along the cut line to reduce chipping.
Crosscuts for End Pieces
Crosscutting involves cutting across the width of the plank. This is necessary when you reach the end of each row.
Best tools: Miter saw (ideal) and laminate cutter
Crosscuts must be clean and smooth to maintain the locking integrity of the next row.
Long Angled Cuts for Walls or Cabinets
Sometimes flooring must be angled to fit against a wall or cabinet.
Tools to use: Circular saw, table saw and miter saw
Pro Tip: Mark the angle precisely with a straight edge to avoid uneven seams.
Short Angle Cuts for Fitting Around Transitions
These cuts are used near:
-
Door thresholds
-
Entryways
-
Corners
A jigsaw with a fine blade gives you the most control.
Curved Cuts for Pipes or Irregular Shapes
Bathrooms, kitchens, and utility areas often require bending laminate planks around pipes or curves.
Best tools: Jigsaw and hole saw (for plumbing cutouts)
Create a template using cardboard or paper before transferring the shape to the laminate board.
Notches for Door Frames and Jambs
Cutting around a door jamb is one of the trickiest parts of installing laminate flooring.
Use: Jigsaw, handsaw and multi-tool
Lay a scrap laminate board against the jamb and mark its height; this ensures a precise, snug fit.
Pro Tips for Perfect Laminate Cuts Every Time
Here are expert-approved techniques that eliminate most cutting mistakes.
-
Use a carbide-tipped blade: A dull blade creates jagged edges. Save time by using carbide-tipped blades for precision.
-
Support the board properly: Place laminate planks on a worktable, secured over sawhorses, to prevent movement.
-
Make test cuts: Always test on scrap pieces before cutting visible floor boards.
-
Use templates for complicated shapes: Never freehand curves or notches, templates save material and time.
-
Always cut in a well-lit area: Visibility is key for maintaining clean cut lines.
Installing Laminate Flooring After Cutting
Once your laminate floor boards are perfectly cut, installation becomes much smoother. Laminate uses a click-and-lock system, which allows planks to float over the subfloor. Ensure that each piece is trimmed accurately so that it locks securely into the next plank without gaps.
Also, maintain a ⅜-inch perimeter expansion gap around edges, walls, baseboards, and molding to accommodate natural expansion.
Common Cutting Mistakes to Avoid
-
Cutting with a dull blade. Using a dull blade tears the laminate surface, causes ugly chipping, and forces more pressure on tools. Always replace or sharpen blades frequently to keep cuts smooth, clean, and accurate.
-
Ignoring the direction of the blade teeth. Saw teeth should face the waste side, not the finished edge. Cutting the wrong way increases chipping and splintering. Check manufacturer blade arrows and instructions before cutting for best results.
-
Rushing through measurements. Rushing measurements causes gaps, tight joints, and wasted planks. Measure twice, mark clearly, and dry-fit boards so seams align neatly and expansion gaps remain even everywhere and visually consistent always.
-
Forgetting underlayment thickness. Forgetting underlayment thickness throws off door clearance and trim height. Always include it in measurements so floor board slides under casings and transitions sit level without awkward, noticeable height lips.
-
Failing to support long planks. Long floor boards sag if unsupported, causing crooked cuts, pinched blades, and chipped edges. Use sawhorses, scrap supports, or a helper so planks stay stable on both sides while cutting.
-
Not wearing safety gear. Cutting tools create sharp offcuts, dust, and flying chips. Wear safety glasses, hearing protection, and a dust mask, keeping hands clear of blades to avoid painful, completely preventable workshop injuries.
-
Laminate dust spreads quickly indoors, coating surfaces and irritating lungs. Attach a vacuum, use dust-collection tools, open windows, or cut outside whenever possible to maintain cleaner air and tidier spaces.
Avoiding these mistakes ensures a professional-looking finish. You can also check out Simple Tips to Extend the Life of Your Laminate Floors.
Conclusion: Expert Laminate Flooring Solutions with Parma Floors
Mastering how to cut laminate flooring is essential for a clean, seamless, and professional installation. With the right tools, accurate measurements, and proper techniques, even DIYers can achieve flawless results. Whether you're cutting laminate boards around door jambs, creating curved notches, or trimming planks to size, precision is key to ensuring a smooth flooring project.
For homeowners looking to elevate their space with premium laminate designs, Parma Floors offers a wide selection of high-quality laminate flooring options suited for every style and room in your home. Contact us today for expert guidance and flooring solutions that guarantee a beautiful, long-lasting finish.
FAQs
1. What is the best tool to cut laminate flooring?
The best tool to cut laminate flooring depends on the cut type, but a laminate floor cutter or miter saw gives the cleanest, chip-free results. For precision crosscuts and angles, a miter saw works best, while a laminate cutter is ideal for straight cuts.
2. Can I cut laminate flooring with a utility knife?
Yes, you can cut laminate flooring with a utility knife, but only for scoring or trimming thin sections. It isn’t recommended for full cuts because laminate planks have a dense core that requires more power. Use the knife for light scoring or small adjustments.
3. What is the best way to cut laminate flooring?
The best way to cut laminate flooring is to use a fine-tooth blade on a miter saw or circular saw and cut slowly to prevent chipping. Always mark your cut line clearly, support the plank, and cut with the decorative side facing down for cleaner edges.
4. How do you cut laminate flooring without a saw?
If you don’t have a saw, you can use a laminate floor cutter or score-and-snap method with a utility knife. While slower, these methods work for basic straight cuts. However, curves, notches, or angles still require a jigsaw or proper cutting tool.
5. Is a laminate floor cutter effective?
A laminate floor cutter is highly effective for straight cuts and produces virtually no dust. It’s ideal for DIY installers who want precise edges without using power tools. However, it cannot make curved, angled, or intricate cuts, so additional tools may still be needed.