How to Create a Professional Wiring Diagram in Minutes
XTEN-AV understands that in modern AV installations, a clear and professional wiring diagram is essential. Whether you are setting up a home theater, corporate boardroom, classroom, or event space, a well-structured wiring diagram ensures that every device is properly connected, power sources are accounted for, and installation teams can work efficiently. Traditionally, creating wiring diagrams required complex software like AutoCAD or specialized CAD tools, but with the right approach and tools, you can generate professional diagrams in minutes. This blog will guide you through the process while highlighting the advantages of video wall vs projector setups and how wiring plans support both.
Why a Professional Wiring Diagram Is Important
A wiring diagram is more than just a map of cables and connections. It provides a blueprint that ensures:
-
Proper device placement and connections
-
Reduced installation errors and troubleshooting time
-
Consistent communication between designers, technicians, and clients
-
Easy maintenance and future upgrades
Without a diagram, installations can become chaotic, with tangled cables, mislabeled connections, and performance issues that could have been avoided with proper planning.
Step 1: Gather All Project Information
Before creating the diagram, collect all relevant information about the project. List all devices including projectors, video walls, displays, amplifiers, speakers, control systems, network devices, and power sources. Include cable types such as HDMI, Ethernet, audio, power, and any specialty cables required for specific equipment.
Also note the locations of each device within the room or space. Understanding the layout and function of the area will help in creating an accurate and functional wiring diagram.
Step 2: Choose a Tool for Quick Diagramming
You do not need complex CAD software to create professional wiring diagrams. Several accessible tools can generate diagrams quickly:
-
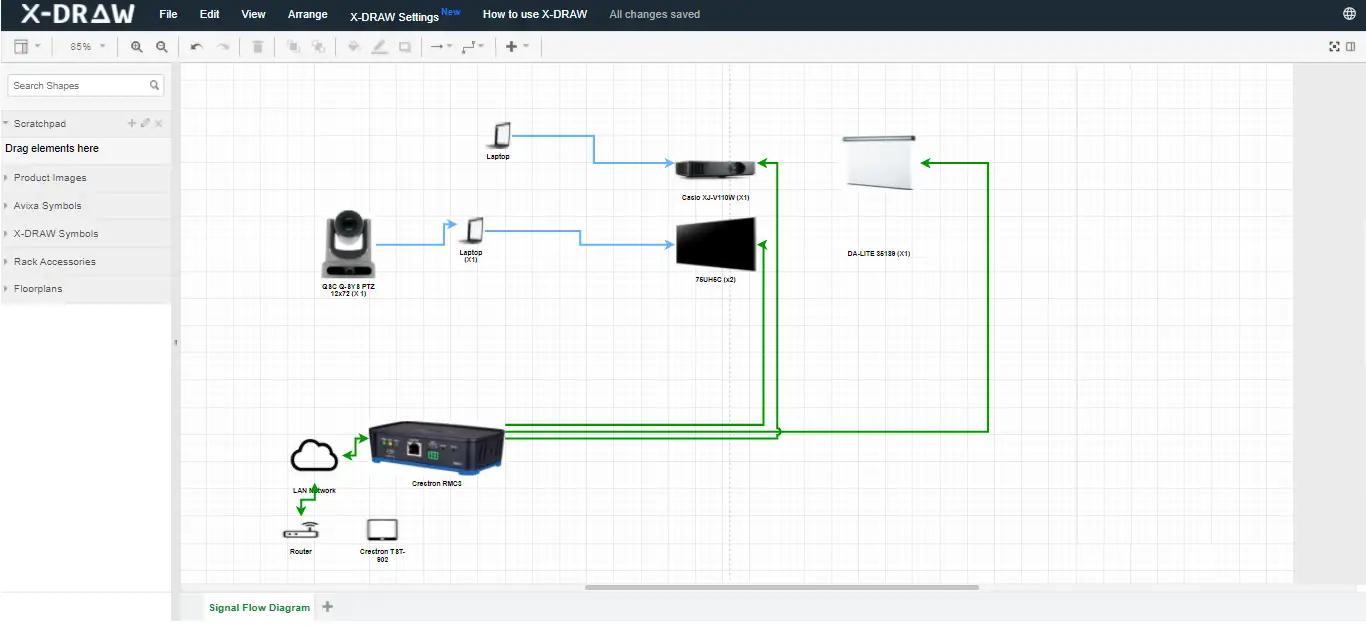
XTEN-AV Software: Ideal for AV professionals, it offers drag and drop device icons, automatic cable routing, and pre-made templates.
-
Microsoft Visio: Provides symbols and connectors for networking and AV installations.
-
PowerPoint or Google Slides: Surprisingly effective for simple layouts using shapes, lines, and text labels.
-
SketchUp or Canva: For more visual diagrams with customizable graphics and room layouts.
Choose a tool that allows you to quickly add devices, draw connections, and label components clearly.
Step 3: Set Up Your Diagram Canvas
Start by creating a blank canvas representing your room or installation space. Include:
-
Room dimensions or scaled floor plan
-
Fixed structures like walls, windows, and doors
-
Furniture or obstructions that may affect cable routing
Using a scaled layout ensures that the wiring diagram reflects real-world installation constraints and allows you to measure cable lengths and plan pathways efficiently.
Step 4: Place All Devices
Place all equipment on the canvas according to their physical locations in the room. Use standardized symbols for clarity: rectangles for racks, squares for displays, circles for speakers, and triangles for control points.
Keeping devices logically grouped makes cable routing simpler and prevents messy, overlapping connections. For example, cluster network switches near the AV rack, and place displays where audience viewing is optimal.
Step 5: Draw Cable Connections
Using lines or arrows, connect devices according to their signal or power requirements. Different line colors or styles can represent different cable types:
-
HDMI for video connections
-
Audio cables for speakers and microphones
-
Ethernet for networked devices
-
Power lines for electrical connections
Route cables along walls, ceilings, or conduits where possible to reflect realistic installation paths. Avoid crossing cables unnecessarily, as this can confuse technicians and increase the risk of interference.
Step 6: Label Every Connection
A professional wiring diagram must include labels for each cable and device. Use unique identifiers such as HDMI1, S1 for Speaker 1, or PWR1 for power outlets. This labeling allows installers to follow the diagram easily and ensures that each cable is connected to the correct port or device.
Include a legend or key to explain symbols, line types, and labels. This makes the diagram readable by anyone, including clients, technicians, and future maintenance teams.
Step 7: Add Notes and Instructions
Include additional notes for installation details, such as:
-
Recommended cable lengths
-
Preferred cable routes through conduits or ceilings
-
Special installation instructions for ceiling-mounted projectors or video walls
-
Labeling conventions for racks and ports
These notes prevent confusion during installation and help avoid mistakes that could lead to downtime or additional labor costs.
Step 8: Review and Refine
Before finalizing your diagram, review it carefully. Check that:
-
All devices are represented accurately
-
Cable paths are logical and feasible
-
Labels are clear and match physical components
-
No connections are missing or duplicated
Sharing the draft with colleagues or technicians for feedback is highly recommended. They may catch mistakes or offer practical suggestions for cable routing and device placement.
Video Wall vs Projector Wiring Considerations
Understanding the differences between video wall vs projector setups can impact your wiring diagram:
-
Video Walls: Consist of modular LED panels that require power, signal distribution, and controller connections. Wiring must account for multiple panels, synchronization, and network connections for content management.
-
Projectors: Typically require fewer connections but need careful consideration of long HDMI or video cable runs, power outlets near the projector, and integration with control systems. Short-throw or ultra short-throw projectors may reduce cable lengths.
Your wiring diagram should reflect these differences to ensure proper installation and minimal troubleshooting later.
Step 9: Export and Share
Once your diagram is complete, export it to a PDF or image format for easy sharing. Include any legends, notes, and version numbers to maintain clarity. A shareable format allows installers, clients, and team members to reference the diagram on-site without needing the original software.
Benefits of Creating Wiring Diagrams in Minutes
-
Time Efficiency: Quick creation saves hours compared to manual CAD drafting.
-
Error Reduction: Clear diagrams reduce installation mistakes.
-
Professional Appearance: Clients and stakeholders appreciate detailed and organized documentation.
-
Flexibility: Easily update diagrams for future upgrades or changes in the AV system.
Final Thoughts
Creating a professional wiring diagram does not require advanced software or extensive training. By gathering project information, choosing the right tools, placing devices logically, and labeling cables clearly, you can produce accurate diagrams in minutes. XTEN-AV supports AV professionals in generating quick and precise wiring diagrams, whether for projectors, video walls, or complex integrated systems.
A well-designed wiring diagram streamlines installations, reduces errors, and ensures that every device performs optimally. With proper planning and clear visualization, your AV projects can be executed efficiently, leaving a lasting impression on clients and end-users alike.
Read more: https://enhanceyourwebsites.com/how-to-design-a-wiring-layout-without-using-autocad/