How to do Interior Wall Painting? 10 Easy Steps
Interior wall painting is one of the most effective and affordable ways to refresh and transform the look of any room. Whether you're redecorating your living room or giving your bedroom a makeover, a fresh coat of paint can make all the difference. A well-done paint job not only enhances the appearance of your space but also protects your walls from wear and tear. It reflects your personality and adds warmth or vibrancy to your interior decor. With the right tools and techniques, even beginners can achieve a flawless finish. In this guide, we will walk you through 10 easy steps to achieve a professional-quality interior wall painting job, even if you're a beginner.
If you're starting from scratch, you can also check out How to Build a Basic Interior Wall: A Basic Guide for foundational construction tips.
10 Easy Steps For Interior Wall Painting
Step 1: Choose the Right Paint
Before starting your interior wall painting project, selecting the right type of paint and interior paint colors is crucial. Consider the finish (matte, satin, semi-gloss), the color palette, and the paint quality. Use low-VOC (volatile organic compounds) paints to ensure a healthier indoor environment.
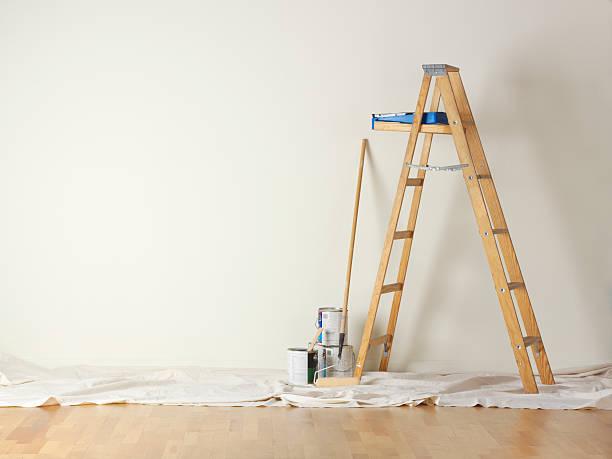
Step 2: Gather Your Tools and Materials
Having the right tools on hand will make the job smoother and more efficient. Here’s a quick checklist:
-
Paint and primer
-
Rollers and brushes
-
Painter’s tape
-
Drop cloths or plastic sheeting
-
Sandpaper
-
Putty and scraper
-
Ladder or step stool
-
Paint tray
Ensure everything is within reach before you start your interior wall painting project.
Step 3: Room Preparation For Painting
Remove furniture or move it to the center of the room and cover it with drop cloths. Take down curtains, wall hangings, and outlet covers. Clean the walls to remove dust, grime, or grease that could affect paint adhesion.
Step 4: Repair and Smooth the Walls
Fill in any holes, dents, or cracks using wall putty. Once dried, sand the patched areas to make them smooth and flush with the rest of the wall. Wipe down with a damp cloth to remove dust from sanding. This step ensures a smooth and professional-looking interior wall painting result.
Step 5: Tape and Cover
Use painter’s tape to protect trim, baseboards, window frames, and any other areas you don’t want painted. Place plastic sheets or drop cloths on the floor and over furniture to avoid splatters. Taking time to tape properly will save time during cleanup and improve the final outcome.
Step 6: Apply Primer (If Needed)
If you're painting over a dark color, stained wall, or a new drywall surface, applying a primer first is recommended. Primer helps the paint adhere better and improves the overall finish. Some modern paints come with built-in primer, but using a separate one can be more effective in some cases.
Step 7: Cut In the Edges
Using an angled brush, start by "cutting in" the edges—this means painting along the trim, corners, and ceiling lines where a roller can't reach. Do this before using the roller for better blending.
Pro Tip:
Cut in one wall at a time, then roll the wall before the cut-in areas dry to maintain a seamless look.
Step 8: Roll the Paint
Use a roller to paint the larger wall areas. Start in the middle of the wall and work in a "W" or "M" motion to evenly distribute the paint. Apply two coats for a more vibrant and durable finish, allowing adequate drying time between coats. This is the core part of any interior wall painting project, so take your time to do it right.
Step 9: Touch-Up and Detail Work
Once the paint is dry, inspect the walls for missed spots, streaks, or uneven coverage. Use a small brush to touch up imperfections and corners. Remove the painter's tape carefully to avoid peeling the paint. Clean edges and smooth finishes are key to a professional-looking result.
Step 10: Clean Up and Reassemble the Room
Clean your brushes, rollers, and trays with warm soapy water (for latex paint) or the appropriate solvent (for oil-based paint). Remove all coverings and reposition furniture. Reattach outlet covers and hang your decorations back up. Take a moment to admire your freshly painted room—your interior wall painting job is complete!
Final Thoughts
Interior wall painting is a simple yet impactful home improvement task that anyone can learn. With the right tools, proper preparation, and some patience, you can transform any room in your home beautifully and affordably.
FAQs
Q1: How long does interior wall painting take?
A: The time depends on the size of the room and the number of coats, but typically it takes 2-3 days including prep, painting, and drying.
Q2: What type of paint is best for interior walls?
A: Latex or acrylic paints are popular for interior walls due to their durability and easy cleanup. Choose finishes like matte, satin, or semi-gloss based on your room’s use.
Q3: Do I need to use a primer before painting interior walls?
A: Primer is recommended especially for new drywall, stained walls, or when changing from a dark to a light color to ensure better paint adhesion and finish.
Q4: Can I paint over a wallpaper?
A: It’s possible but not always recommended. Painting over wallpaper can lead to peeling or bubbling; it’s best to remove wallpaper before painting.
Q5: How do I avoid streaks and brush marks while painting?
A: Use quality brushes and rollers, apply thin, even coats, and maintain a wet edge while painting. Proper prep and sanding also help achieve a smooth finish.