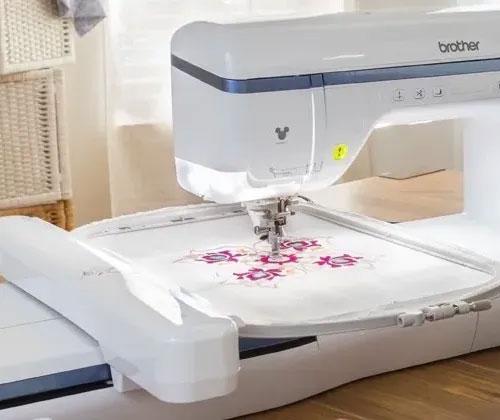
The Art of Logo Digitizing: Tips for Flawless Embroidery Designs

Introduction
Turning a company logo into an embroidered masterpiece is part science, part magic. While anyone can convert an image to stitches, true logo digitizing requires an artistic eye and technical know-how to make designs pop on fabric. Poor logo digitizing leads to fuzzy edges, broken details, and disappointed clients - but done right, an embroidered logo becomes a walking billboard for any brand.
This guide reveals the trade secrets professional digitizers use to create flawless embroidered logos every time. Whether you're handling logo digitizing for corporate polos, baseball caps, or branded merchandise, these tips will help you avoid common pitfalls and achieve pro-level results with your logo digitizing projects.
Why Logo Digitizing Differs From Regular Embroidery
Logo digitizing presents unique challenges:
-
Brand integrity - Every stitch must match exact colors and proportions
-
Scale variations - Same logo might need to work on a hat or a jacket back
-
Material diversity - From dress shirts to workwear uniforms
-
Detail preservation - Critical for recognition, especially with small logos
A good digitizer doesn't just convert artwork - they adapt it for the medium while maintaining the brand's visual identity.
Pre-Digitizing Preparation
1. Start With the Right Artwork
Ideal files:
-
Vector formats (AI, EPS, PDF)
-
High-resolution PNG (1000px+ width)
-
Clean, simplified versions without tiny details
Problem files to avoid:
-
Low-resolution JPGs
-
Watermarked images
-
Overly complex illustrations
Pro Tip: Always ask clients for original brand files - never pull logos from websites.
2. Analyze the Design Elements
Break down the logo into:
-
Text elements (needs clean satin stitches)
-
Solid areas (fill stitch considerations)
-
Fine details (may need simplifying)
-
Color transitions (blending techniques)
3. Determine End Use
Ask these key questions:
-
What garment/fabric will this stitch on?
-
What size will the final embroidery be?
-
Are there any special wear conditions?
-
Will this need to match existing embroidered items?
Core Digitizing Techniques for Logos
1. Text Treatment
For readable embroidery:
-
Minimum height: 6mm for satin stitch
-
8mm+ for small text on caps
-
Simplify complex fonts
-
Adjust letter spacing (kerning)
Special cases:
-
Reverse text (light on dark) needs underlay
-
Script fonts may need manual stitch editing
2. Color Block Management
Best practices:
-
Limit to 6-8 thread colors maximum
-
Cluster elements by color to minimize changes
-
Use Pantone matching for brand colors
-
Consider color blending for gradients
3. Detail Preservation
When simplifying:
-
Maintain key identifying features
-
Combine tiny elements when possible
-
Convert thin lines to running stitches
-
Use fill stitches for solid areas
4. Stitch Direction Strategy
For professional results:
-
Alternate angles in different sections
-
Follow natural contours of shapes
-
Use radial stitching for circular elements
-
Keep consistent across logo variations
Fabric-Specific Adjustments
Different materials require unique approaches:
| Material | Key Adjustments |
|---|---|
| Polo Shirts | Lighter density, more underlay |
| Caps | Tighter stitches, shorter jumps |
| Jackets | Increased density for thickness |
| Towels | Longer stitches for loops |
| Performance Wear | Stretch compensation |
Remember: Always stitch test on actual material.
Common Logo Digitizing Mistakes
1. Over-Digitizing
-
Too many stitches in small areas
-
Unnecessary detail that won't stitch cleanly
2. Underlay Issues
-
Skipping underlay on light fabrics
-
Using wrong underlay type for material
3. Density Disasters
-
Puckering from excessive density
-
Fabric show-through from too little
4. Registration Problems
-
Poor alignment between colors
-
Gaps at meeting points
Advanced Professional Techniques
1. 3D Puff Effects
-
Special foam underlay
-
Wider satin stitches
-
Increased stitch density
2. Metallic Thread Optimization
-
Slower machine speed
-
Longer stitch lengths
-
Reduced tension
3. Appliqué Methods
-
Fabric placement techniques
-
Clean edge finishes
-
Stitch-down strategies
Quality Control Checklist
Before finalizing any logo digitizing file:
-
Software Simulation
-
Check for jump stitch excess
-
Verify proper sequencing
-
-
Stitchout Test
-
Use scrap of actual material
-
Check tension balance
-
Examine from normal viewing distance
-
-
Wash Test
-
Check durability after laundering
-
Look for loose stitches
-
-
Client Approval
-
Get sign-off on physical sample
-
Document any special requests
-
Tools of the Trade
Professional digitizers rely on:
-
Software: Wilcom, Pulse, Hatch
-
Hardware: High-resolution monitors, graphics tablets
-
References: Pantone guides, stitch length rulers
-
Testing: Multiple machine models
When to Outsource
Consider professional digitizing services when:
-
Dealing with ultra-complex logos
-
Needing perfect brand color matching
-
Working with difficult materials
-
Under tight deadlines
The Future of Logo Digitizing
Emerging trends to watch:
-
AI-assisted simplification for complex artwork
-
Dynamic stitch optimization for different materials
-
Augmented reality previews of finished products
-
Eco-friendly digitizing to reduce thread waste
Conclusion
Masterful logo digitizing blends technical precision with artistic interpretation. By following these professional techniques - starting with clean artwork, making fabric-specific adjustments, and rigorous testing - you can transform any logo into embroidery that does the brand justice.
Remember:
-
Great digitizing is invisible - the logo should look "right," not over-engineered
-
Every brand deserves careful treatment of their visual identity
-
Testing is non-negotiable for professional results
Your next embroidered logo could be someone's first impression of a business - make every stitch count.

- Art
- Causes
- Best Offers
- Crafts
- Dance
- Drinks
- Film
- Fitness
- Food
- Giochi
- Festival
- Gardening
- Health
- Home
- Literature
- Music
- Networking
- Altre informazioni
- Party
- Religion
- Shopping
- Sports
- Theater
- Wellness


