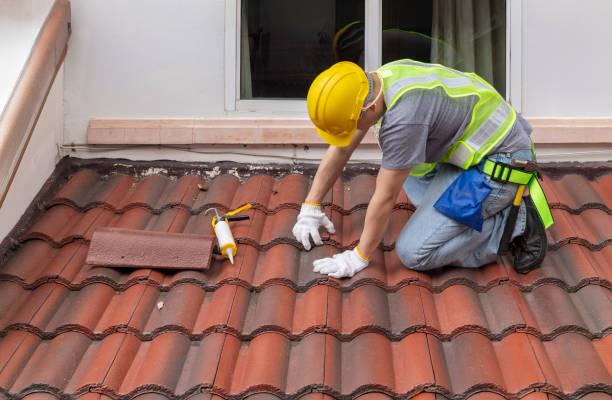
Roof Repair Made Easy: How to Fix Your Roof in 5 Steps

Roof repair is an essential part of home maintenance that many homeowners delay until problems become urgent. However, addressing roof issues early can save you from costly damage, leaks, and structural problems. Whether you’re dealing with loose shingles, minor leaks, or storm damage, understanding how to perform basic roof repair is valuable knowledge for every homeowner. This guide will walk you through five simple, practical steps to make roof repair manageable—even if you’re not a professional. Along the way, you’ll learn how to safely inspect your roof, gather the right tools, and apply repairs that can extend your roof’s lifespan. For those wanting more detailed advice, there are many helpful resources to support your efforts and ensure a successful repair.
5 Essential Steps for Effective Roof Repair
Step 1: Inspect the Roof for Damage
Before starting any repair, it’s critical to conduct a thorough roof inspection. This helps identify the specific areas needing attention. Use binoculars or safely climb a ladder to examine the shingles for cracks, curling, or missing pieces. Look for signs of water damage inside your home too, such as stains on ceilings or walls, which may indicate leaks. Pay close attention to vulnerable areas around chimneys, vents, and skylights, as these spots are prone to wear. Keep a checklist and take photos to document the damage. A detailed inspection helps you plan repairs efficiently and prevents overlooking hidden problems.
Step 2: Gather the Right Tools and Materials
Successful roof repair depends on having the appropriate tools and materials ready. Having the proper tools on hand will make the roof repair process smoother and more efficient. Depending on the issue, you may need:
-
Replacement shingles or tiles
-
Roofing nails
-
Roofing cement or sealant
-
Pry bar or hammer
-
Safety gear (gloves, non-slip shoes, harness)
Always prioritize safety—if your roof is steep or high, it may be safer to consult a professional.
Step 3: Remove Damaged Roofing Material
Carefully remove the damaged shingles or tiles by gently lifting them with a pry bar. Pull out the nails without causing further damage to surrounding areas. It’s important to work slowly and methodically to avoid tearing the underlying roofing felt or damaging the roof deck. Dispose of the old material properly to keep your work area clean and safe. Removing damaged components ensures a clean surface for the new materials, which improves the durability of the repair.
Step 4: Install New Roofing Material
Place the replacement shingles or tiles in the area where the damaged material was removed. Align them carefully and secure them with roofing nails, making sure the nails go just above the adhesive strip on shingles to prevent leaks. For tile or metal roofs, follow manufacturer instructions for proper placement and fastening. Apply roofing cement or sealant around edges and seams to create a watertight seal. Pay attention to overlapping shingles correctly to ensure water flows away from the roof’s surface, preventing future leaks.
Step 5: Check Your Work and Monitor for Leaks
After completing the repairs, double-check that all materials are firmly in place and sealed properly. If possible, use a hose to spray water over the repaired area to test for leaks. Continue monitoring your roof over the following weeks, especially after heavy rain or storms, to ensure the repair holds up. Scheduling regular roof inspections can help catch issues early and maintain your roof’s integrity for years to come.
Conclusion
Roof repair doesn't always require a professional—sometimes, with the right tools and knowledge, you can address small issues on your own. Regular inspections and quick fixes can extend your roof's life and prevent more costly repairs down the road. However, for extensive damage or structural concerns, don't hesitate to reach out to a licensed roofing specialist.
Frequently Asked Questions (FAQs)
Q1: How often should I inspect my roof for repair needs?
A1: It’s best to inspect your roof at least twice a year—in spring and fall—and after major storms. Regular checks help catch small problems before they turn into bigger repairs.
Q2: Can I do roof repair myself or should I hire a professional?
A2: Small repairs like replacing a few shingles or sealing minor leaks can be done DIY if you feel comfortable and follow safety guidelines. However, large-scale damage or steep roofs are better handled by professionals.
Q3: How long does a typical roof repair take?
A3: Minor repairs usually take a few hours to a day, depending on the extent of damage and weather conditions. Larger repairs may take longer and require multiple visits.
Q4: What tools are absolutely necessary for roof repair?
A4: Essential tools include a hammer, pry bar, roofing nails, roofing cement or sealant, replacement shingles, gloves, and a ladder. Safety gear is crucial to prevent accidents.
Q5: Will roof repair increase the value of my home?
A5: Yes. Keeping your roof in good condition improves curb appeal, prevents costly water damage, and is a strong selling point for potential buyers.
- Art
- Causes
- Best Offers
- Crafts
- Dance
- Drinks
- Film
- Fitness
- Food
- Игры
- Festival
- Gardening
- Health
- Главная
- Literature
- Music
- Networking
- Другое
- Party
- Religion
- Shopping
- Sports
- Theater
- Wellness


